How to host a pomander party
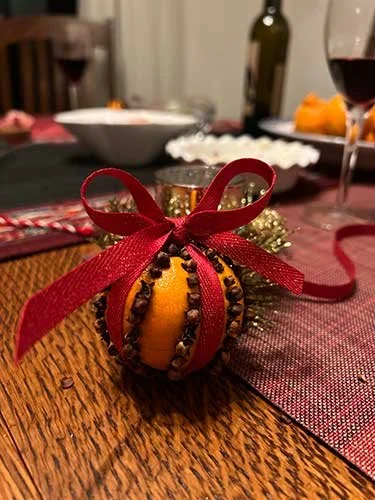
A sweet little orange pomander from my friend Holly’s pomander party last Christmas
Making Pomanders is one of my favorite holiday traditions and I want to share the details so it can become yours too.
What’s a pomander you ask? The word comes from the French “pomme d’ambre” meaning amber apple - essentially a perfumed ball. It’s an old herbalist technique that has been around for centuries. Traditionally, pomanders covered unpleasant smells and sometimes had medicinal uses.
Today, instead of medicine, a pomander is a thing of sensual beauty that makes the holidays special with community, fragrance and natural beauty to grace out homes. At Christmas time, they are commonly made from oranges decorated with whole cloves and seasonal spices.
I love to get together with girlfriends to have a little pomander party before Christmas. It’s a fun excuse to have a great time with friends. The fragrance from making the pomanders is intoxicating, and everyone goes home with something gorgeous to give as a gift or decorate their homes.
My dear friend Holly hosted a pomander making party in her beautiful home last Christmas and I took lots of pictures so I could show you how to make one yourself or even host your own party. I hop you do both!
Supplies needed
To make pomanders, you’ll need
Fresh oranges (or any citrus really! You can make pomanders with lemons, limes, grapefruit, pomellos…Be creative)
whole cloves
a nail or wooden skewer to pierce the skin of the citrus
arrow root powder for preservation (optional)
any additional spices you like such as cinnamon, mace or nutmeg (optional)
ribbons (optional)
Pomander supplies all ready to go
How to method 1
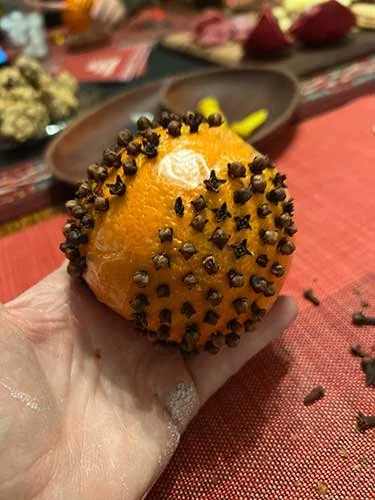
The simplest way to make a pomander is to use your sharp tool (nail or skewer) to poke holes in the orange skin. Then push the whole cloves into the orange - like you’re studding a ham.
The first pomander I ever made was in girl scouts and we just pushed the cloves in with our fingers without making a hole first. I remember it being painful and difficult. The troop finished feeling very proud of our pomanders but with bloodied hands. Using a tool to poke a hole first is an easy solution.
When you finish, the orange will be beautifully decorated with cloves and it will smell amazing.
Here you can see a pomander started with a wooden skewer to make holes. The first few cloves are inserted. Holly put out corn cob holders as another way to make holes in a fun pattern
Here’s an orange fully studded with a little room left open to add a ribbon later. You can see where I placed some tape to block out space for my ribbon.
How to method 2
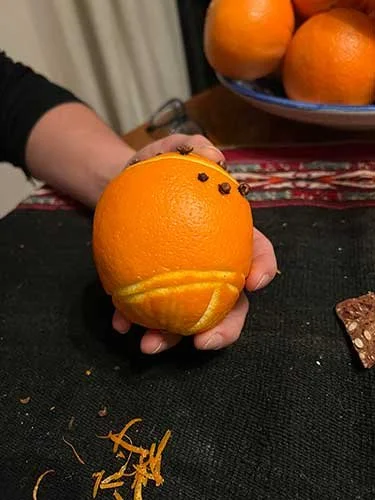
If you have a fancy zester for cocktails, it is a fun tool to make patterns on your orange. The zester can add a linear element to the design and give you a starting point for decorating with cloves
Finishing up
After you’ve added all the cloves you want, you can take an extra step with more spices. I like to have bowls of spices laid out so I can roll the pomanders and fully coat them. You can buy large quantities of cinnamon and other baking spices at Costco pretty reasonably.
Start with a light dusting of arrow root powder. This helps preserve the pomander
You can then roll it in cinnamon or any other aromatic baking spice.
Add some ribbons
Before starting with my cloves, I like to use scotch tape to mark off areas where I want to tie ribbons at the end. I then fill in the open areas with cloves, remove the tape and tie a decorative ribbon to make a very pretty presentation.
You can see where I masked off areas with clear tape to make a place for ribbons
Here’s another twist on adding ribbons, with fancy rick rack ribbon in a pattern right over the top of the cloves
Now what?
Set your pomander out so that you can enjoy its beauty and fragrance. Over time, it will fully dry and can last for years if you want.
I love to fill a beautiful wooden bowl or a basket with a collection of them along with some greens to decorate the entrance table at my house or for a clever center piece.
If you use ribbons to tie yours up, you could hang them from a tree or make a decorative mobile hanging from a chandelier.
The possibilities are endless.
I’m really looking forward to gathering with my friends this season and making a fresh batch. I’ll enjoy them in my home as a decoration but mostly as a reminder of the love and connection and creative time with my besties.
Happy Christmas everyone. Make it beautiful


